-
Most Popular
Learning to make sprites
I was looking through the contents of the cassette that came with the ... Read More!Amstrad 3.5" Floppy drive - DSK to Disc
So you've got the floppy drive all powered and plugged in, but got no Amstrad CPC software on 3.5" d... Read More!Connecting a 3.5" floppy drive to an Amstrad 464 without modifying the drive or DDI-1
Quite some time ago I bought a DDI-1 interface to use with my amstrad 464's. Just the interface with... Read More!Schneider (Amstrad) CPC 664 surprise
As a collector of Amstrad machines, the holy grail to me is the Amstrad CPC 664. Only manufactured f... Read More!Yet more Amstrads added to the collection - ALT-386sx and PCW8256
If you haven't guessed already, I like my Amstrad computers. Purely because of nostalgia and curiosi... Read More!
Connecting a 3.5" floppy drive to an Amstrad 464 without modifying the drive or DDI-1Created on: 16-12-2020 By Gee |
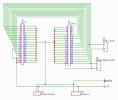
Quite some time ago I bought a DDI-1 interface to use with my amstrad 464's. Just the interface with the ribbon cable, no FD-1 floppy drive. Why did I buy that by itself? well I wanted to clone it and/or make it work with a regular 3.5" PC floppy drive. So far, I have it partially working! But it took until I eventually bought an FD-1 to make sure the DDI-1 interface was in fact working.
The birds nest of wires So you should be able to see from the pictures above that this device has been made entirely on a prototype board. The wires look like they're going everywhere and connected to everything. Hopefully they aren't! I started making this board by noting down the pinout on the regular PC floppy drive ... Read More! |
|
|
Amstrad 3.5" Floppy drive - Making a new ribbon cable, case and switchesCreated on: 07-07-2019 By Gee |
So if you've followed the previous blog posts about making a PC 3.5" floppy drive work with your Amstrad CPC 6128, then you should have a working drive and be able to make physical copies of the disc images you have.
To make things better I decided to make my own ribbon cable, connect some switches so I can choose side A or B on the disk AND also a switch to make the external drive take over as drive A. Sadly doing this method doesn't change the internal drive to drive B. It is possible, but I don't fancy doing it as it involves cutting traces on the board. Not something I want to do to my 30+ year old machine. It's made it this far, no point in killing it now. To make the ribbon cable, I bought half a metre of 34 way ribbon c... Read More! |
|
|
Amstrad 3.5" Floppy drive - DSK to DiscCreated on: 21-06-2019 By Gee |
So you've got the floppy drive all powered and plugged in, but got no Amstrad CPC software on 3.5" discs yet?
The first thing I done was to cover the high density hole on the floppy's I had then format them to data discs (using CP/M to format on drive B) then I downloaded discology and copied my 3" disc of CP/M to a 3.5" disc. That done three things for me; Confirmed that the software I was using on my pc worked, the 3.5" floppy drive worked as it should and that I now have a backup of my rather old CP/M disc. So how do you go about this I hear you ask. Well, If you read the fir... Read More! |
|
|
Amstrad 3.5" Floppy drive Ribbon CableCreated on: 18-06-2019 By Gee |
Part three of making a standard 3.5" floppy drive work with your Amstrad cpc 6128 is rather easy in one way, but not so easy in another.
The easiest way to get your floppy drive connected to the Amstrad CPC is to use a ribbon cable from an old PC. Old enough that it had a 5.25" floppy drive in it. The reason for using such an old cable is that it just so happens to use the same connections you need for connecting your floppy directly to the Amstrad CPC with no modifications. One end being a normal floppy IDE connector and the other being an edge connector. Sounds easy doesn't it? Well it is... once you have a cable. If you're lucky enough to have a stock of the cables, then fantastic! Otherwise you'll be searching the i... Read More! |
|
|
Amstrad 3.5" Floppy drive Powering the driveCreated on: 17-06-2019 By Gee |
After getting the ready signal sorted on the floppy drive, the next thing that was needed was to get the drive powered.
I done some research on what kind of amperage a floppy drive needs to run correctly and came up with the recurring answer of around 700ma from a 5v DC power supply. The great thing about this is that it means that I was able to use a USB cable to power the drive. Seeing as I have numerous USB cables in the house, I cut the end off of one and then set about finding a way to connect it to the drive itself. The floppy drives use a Berg Connector to connect them from an ATX power supply. I have an old ATX power supply in my loft, waiting to be use... Read More! |
|
|
| 1 2 |


